Thursday, August 25, 2011

Transition & Pocket Full of Love

We started back to school this week and the new routine is good, but of course an adjustment for all of us.  For the first time in 9 years all of my girls are in school, at the same school, and at the same time (for most of the day).  My youngest gets out at 11, but from 7:30 to about 10:45 I have total peace and quiet - it's odd, but I am sure I will settle in just fine!  My hope is that this time will allow the creative (and cleaning) juices to flow!

In preparation for school, my 1st grader needed some extra reassurances about a new year, new teacher, the long day, missing Mommy, etc.  I think you get the picture.  Crissy over at Crissy's Crafts { http://crissyscrafts.blogspot.com/ } came up with the sweetest way to remind her girls how much she loved them.  You can check out her tutorial here http://crissyscrafts.blogspot.com/2011/08/pocket-full-of-kisses.html

I could not do Kisses, because of our 90+ degree heat, but I did laminate a small picture of each child with my husband and I and tucked it inside the pocket.  I attached them to their backpacks.  For my 1st grader, I put in inside the outer pocket where she keeps her snack, so she can take a peek before recess. 

Here is the final result:


Front of Pockets
I grommeted the corners and added a key ring so they
could handle the rough and tumble of the backpack.

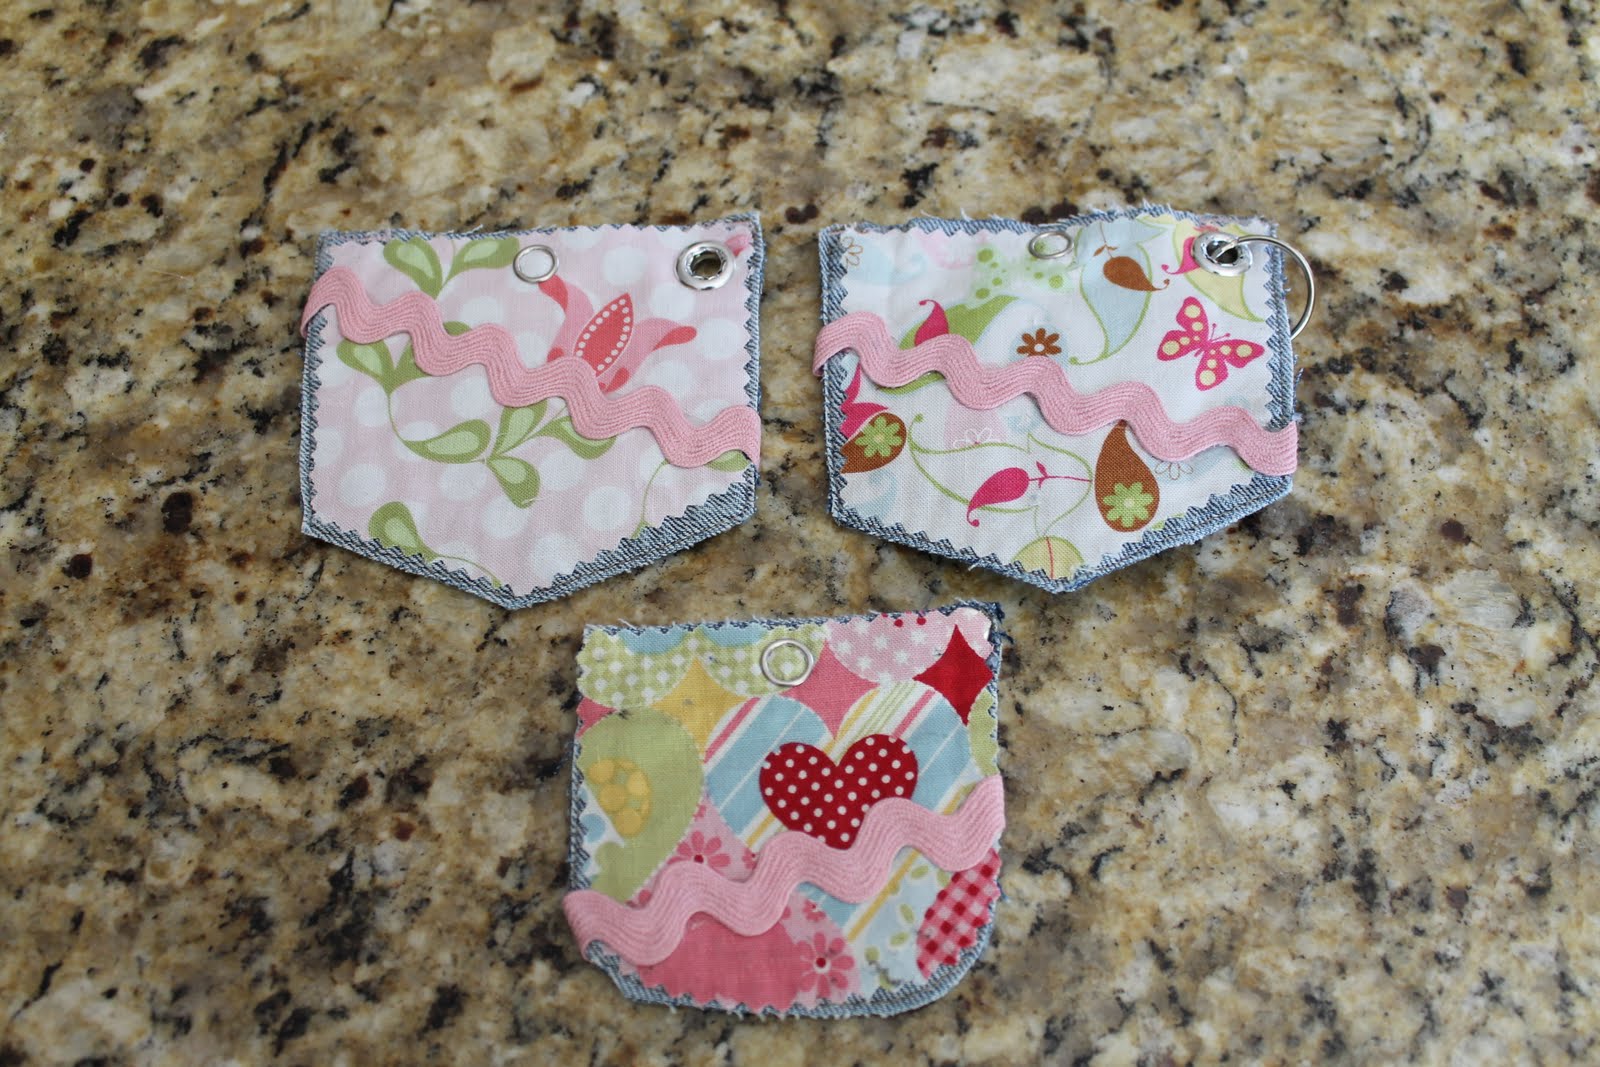
Back of Pockets


I also made one for our Godson, for his first day of preschool.  To keep it "boy" I went with his initial instead of rick-rack and something too cutsie.  Happy Crafting! 


Tuesday, August 9, 2011

Organizing with Chalkboard Sheets

I found some self stick chalkboard sheets at Michaels and thought of so many great ways I could use them.  One project that has been on my list forever has been to better organize the cabinet above the phone in the kitchen.  It houses many things and it's always been fairly clean, but now anyone could open it and find exactly what they need.  As you can see this is a place where I keep notes, the ongoing grocery lists for Costco, Safeway, etc and also a list of important numbers.


The bakery tins are a fun and cheap ($1 from Dollar Tree) way to keep things organized.  I cut out the chalkboard sheets with my Big Shot and a Nestabilities die.  The chalkboard allows for quick changes of the contents.  I used a Chalk Ink Wet Wipe Marker also from Michaels to label each tin. 


I am very happy with the end result!  Happy Organizing!


Tip Junkie handmade projects


Visit thecsiproject.com


Tuesday, June 14, 2011

It's been awhile. . .


Did the end of the school year completely wipe you out?  It's such a bittersweet time that we just can't miss a minute of, but I am happy it's come to an end! The arrival of Summer has been a bit slow around here, but I am glad to say that the sun finally came back and the heat is on!  We are settling into the "no schedule" routine of Summer.  I know that sounds odd - to clarify:  we have goals for the day, but can be flexible when a friend calls for a playdate or popsicles or lemonade just can't wait.  I am hoping for lots of creative time and that my paperstack will be a little shorter for a few months. 

Something fun for baby. . .

Spring brought a few new babies into our life and the burpcloths below make for great gifts for any Mom.  You can never have too many burpcloths.  When my girls were babies I loved to use the thick cloth diapers made by Gerber for burpcloths.  Every part of the diaper is thick and absorbs evenly.  They make really lovely, personal, and practical gifts.  Enjoy!

I start with one cloth diaper and two 2" strips of fabric backed with fusible webbing (I use Wonder Under).  It's best to cut a slightly larger (5"") strip of Wonder Under and iron that onto the BACK (wrong side) of your fabric, then measure and mark your 2" strips to cut.  I usually cut the strips with pinking shears for give it a cute edge and it ends of doing that little raw/ruffly thing when it's washed.


Peel back the Wonder Under and remove the paper.  Set your fabrice strips at both ends of the diaper.
I set it up to cover the blue stitching at the bottom and I choose the embellish the side that is not
stamped "Gerber". 


Once your strips are where you want them begin to iron them onto the diaper and get ready to sew! 


I sew a straight swtich around the edge of the strip rounding the corners and backstitching at the end.


The cloth's only take about 15 minutes to make and they are a very special and unique gift.


Monday, May 16, 2011

Composition Book Re-Do: Pencil Included

So my middle one gets in the car the other day with a pencil and a piece of paper. Keep in mind that there are at least 10 notebooks of varying sizes in the drawer for "notebooks" and other things that are okay to take in the car. We also have a "church bag" that has all kind of supplies that we often grab for places other than church. On that day for some reason she just wanted a pencil and paper - going simple I guess. We were headed to the talent show at school and she was concerned she might get bored and need to draw or maybe take notes - who knows? Anyhow, it occured to me that a journal with a pencil attached that could live in the pocket behind the passenger seat might just be the perfect car accessory for my craft/art obsessed 5 year old. So, once everyone was off to school I grabbed a few supplies and got to work. Here is the final product and how I did it - enjoy!

I used a composition book, a scrap piece of paper, felt, Mod Podge & a glue gun.  I trimmed the paper to size, allowing an extra inch or so to fold over the edge of the book.  The paper is less likely to separate from the book this way.  I attached the paper with Mod Podge and sealed it as well.  I cut the felt long enough and wide enough to accommodate a pencil.  Using a glue gun I attached the "pocket" to the cover.  I personalized it with a {b} to make it hers, stuck a pencil in and walaaa:  notebook, pencil included!  I think she will be just thrilled.

Tip Junkie handmade projects  Photobucket

Sunday, May 8, 2011

First Linky!

I posted and linked to my first "linky party".  Check out all the great ideas at
http://www.iheartnaptime.net/

Happy Mother's Day!

Wednesday, May 4, 2011

Felt Flower How To


After finding several wonderful felt flower tutorials and some trial and error I combined a few and came up with my own version.  I am all about kits and making things that I can mass produce.  I like to make all the parts then sit down and crank 'em out!  I started by using my Big Shot die cutting machine and the Quickutz squeeze along with a Quickutz flower shaped die – worked great!  For a few days I kept my gear (the Quickutz squeeze, the die, and the felt) in the front seat and punched out flowers while waiting in the pickup line at school.
I love using every possible minute of my day - most of the time (-:  At the end of the week I had a great stash of supplies for making these cute clips in a snap.

Check out my cool supply kit!

You can also make a template with cardstock, trace it on the felt and cut out the flower. Cut 12 flowers of one color and one accent color for the center.  Cut 1 leaf or circle for the base.


Now to the flower making!  Start by folding the flower in 1/2, then fold into thirds.


Cut the a very small amount off of the point of the flower to create a flat surface for the hot glue.  Put a drop of hot glue on the cut surface and press firmly onto the leaf.


Hold it in place 20-25 seconds to make sure it’s stuck! Continue attaching the
flowers in a square pattern. Fill in the gaps with the remaining four flowers
and attach the accent flower for the center.


Hot glue a hair clip to the back of the flower and share with a friend – it’s sure to be a hit!


Running with Glitter


Tip Junkie handmade projects

Monday, April 18, 2011

New Banner!

What do you think of the new banner?  Many thanks to my very talented friend Traecy for the beautiful design and for finding time in her "paperstack" to create this beautiful banner.  I am working on a tutorial to share soon and hoping that Spring break will provide some time to get this blog really rolling!  Be sure to come back!

Thursday, February 24, 2011

Giving It A Whirl!

After spending the last 6 months "blog hopping", I have decided to dive in!  I am completely unequipped to do this, but with some help here and there, I am giving it a whirl!  I hope you enjoy the ride!